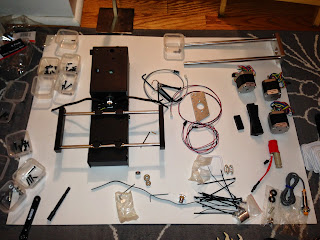
A few notes about the kit, if any of you are considering it:
- The pieces are extremely solid. The entire thing is made up of very quality parts that will definitely last a good long time.
- The photo-based instructions are vagueish and not really all that helpful. In fact, if you only follow the instructions given, the hot end never actually gets installed - you have to figure it out for yourself that it might be important, being the BUSINESS END OF THE PRINTER AND ALL.
- While they've cut a lot less corners than with the Simple wooden version, the belts are sill secured with zip ties, and I've had at least one issue with it so far from printing with it for two days.
- If this is your first 3D printer, I'd recommend you read up a bit on GCode and Slic3r before ordering even the fully assembled version. I got through it okay, but I'm pretty familiar with microcontrollers and that helped as far as understanding what the heck they were asking you to do during initial setup.
- It's fiddly. I had to rebuild the Z axis assembly twice before it ran smoothly. The extruder jammed once, and the X axis lost tension when running their provided GCode for a fan shroud because the X axis slammed into the frame and pulled the zip tie off the belt. A MakerBot it is not, but it's also not 2K$.
Below are some random shots of the build in progress, followed by the obligatory "it works!" video printing a heart-shaped pencil grip I spent all of 30 seconds on (Art it isn't, but it worked as a good SketchUp to print test). I'll play around with maybe printing some of my Cinema 4D models later, once I have stable printing. I'll probably also post my print settings in another post once I've had a chance to play around with it and get it just right.
And here, you can watch it merrily singing to itself:
Now go build something awesome!
~Lexikitty


No comments:
Post a Comment